Installing Windows 11 on a brand-new PC or SSD may seem intimidating at first, especially if you have never built a computer or performed a clean installation before. Fortunately, the entire process is straightforward when you follow the correct steps. At Your System Fixer, we regularly publish practical Windows tutorials to help beginners and enthusiasts solve common PC issues.
In this guide, we will walk through the complete Windows 11 installation on a new PC, from creating installation media to configuring Windows after setup. The tutorial is based on the latest Windows 11 25H2. Let’s start exploring.
When Do You Need to Install Windows 11 on Your New PC
Before getting started, it’s important to determine whether you actually need to install Windows 11. Some computers already include Windows out of the box, while others require a fresh installation.
You typically need to install Windows 11 in the following situations:
- Build a custom PC and no operating system is installed.
- Install a brand-new SSD or NVMe drive.
- Replace your existing system drive.
- Perform a clean installation for maximum performance.
- Previous Windows installation became corrupted.
- Upgrade hardware and want a fresh start.
If your prebuilt computer already boots into Windows, you may not need to reinstall the operating system.
What You Need Before Installing Windows 11
Before creating a Windows 11 installation media and booting your new PC, make sure you have everything prepared. Spending a few minutes on preparation can save you a lot of troubleshooting later.
First of all, you need to make sure your PC meets the official Windows 11 system requirements. Here are the minimum system requirements for Windows 11 25H2:
- Processor: 1 GHz or faster with 2 or more cores on a compatible 64-bit processor.
- RAM: 4 GB.
- Storage: 64 GB or larger storage device.
- System firmware: UEFI with Secure Boot capability.
- TPM: Trusted Platform Module (TPM) version 2.0.
- Graphics card: Compatible with DirectX 12 or later with a WDDM 2.0 driver.
- Display: 720p HD display (or greater) that is larger than 9 inches diagonally.
If your computer fails to install Windows 11 due to the requirements, don’t worry. You still can install Windows 11 on an unsupported PC by bypassing some settings.
To install Windows 11 on a new SSD or laptop, you need to prepare these items:
- A USB flash drive with at least 8GB capacity
- Another working computer with internet access
- A Windows 11 product key (optional)
- A stable internet connection
How to Install Windows 11 on a New PC
In a word, the Windows 11 installation process can be divided into the 4 main parts below.
Part 1. Create a Windows 11 Bootable USB Drive
A Windows 11 bootable USB drive contains all installation files required to install the operating system. You can create one using Microsoft’s Media Creation Tool.
Note: This process will erase all existing data on the USB drive. Back up any important files before proceeding.
Step 1. Insert the USB flash drive into the working computer and visit the official Microsoft Windows 11 download page.
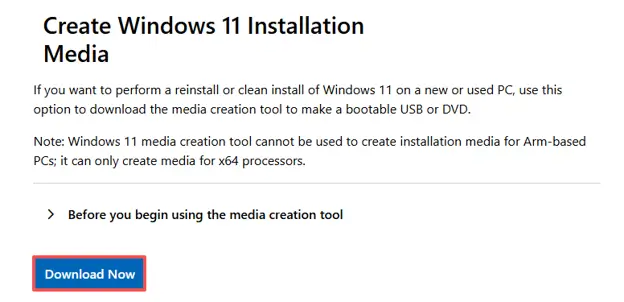
Step 2. Scroll down to the Create Windows 11 Installation Media section and click Download Now.
Step 3. Once downloaded, find the Media Creation Tool and launch it.
Step 4. When prompted, click Accept to agree to Microsoft’s software license terms. The tool will automatically detect your language and edition preferences, and click Next.
Step 5. Choose USB Flash Drive when asked which media to use and click Next.
Step 6. Choose the correct USB flash drive from the list and click Next. Then it will download Windows 11 installation files and create the bootable USB drive. This process may take several minutes depending on your internet speed.
Step 7. Once the tool displays Your USB flash drive is ready, click Finish. You now have a bootable Windows 11 installation USB.
Part 2. Boot from USB on Your New PC (BIOS / Boot Menu)
The next step is to tell your new computer to start with the installation of the USB instead of the internal storage drive.
Step 1. Insert the Windows 11 bootable USB drive into the new PC. Power on the computer.
Step 2. Immediately begin pressing the appropriate key repeatedly during startup. If the Boot Menu does not appear, try entering BIOS using Delete or F2.
Common boot keys include:
- Dell: F12 or F2
- HP: F9 or ESC
- Lenovo: F12
- ASUS: F2 or Delete
- MSI: F11 or Delete
Step 3. In the BIOS utility, navigate to the Boot Menu tab and select your USB flash drive.
Tip: If the system keeps booting into BIOS or shows “No Boot Device Found,” verify that the bootable USB was created successfully and that UEFI boot mode is enabled.
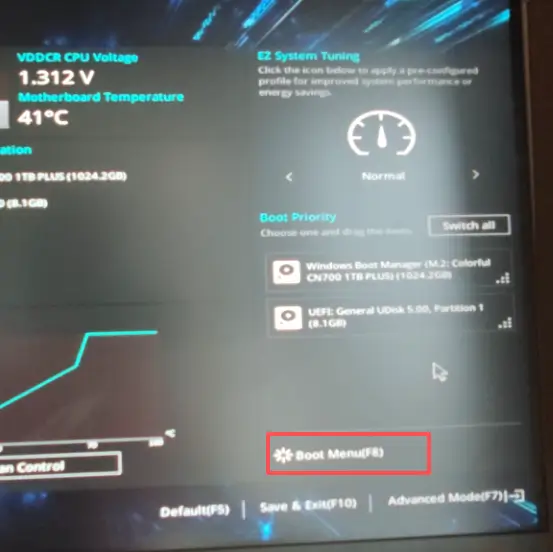
Step 4. Then press F10 to save the changes and restart the computer. After rebooting, the Windows Setup screen should appear, and you are ready to install Windows 11 on your new SSD.
Part 3. Install Windows 11 on Your New Drive
Now, your PC should boot from the USB drive, and the Windows Setup screen should be visible.
Step 1. On the Windows Setup screen, click Install Now to begin the installation process.
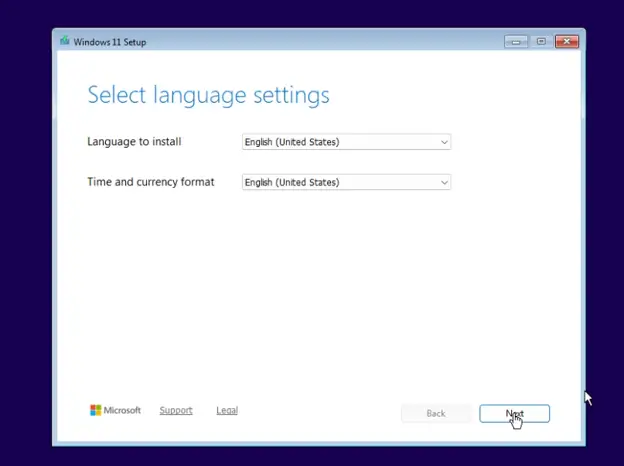
Step 2. Select Language settings and Setup Options.
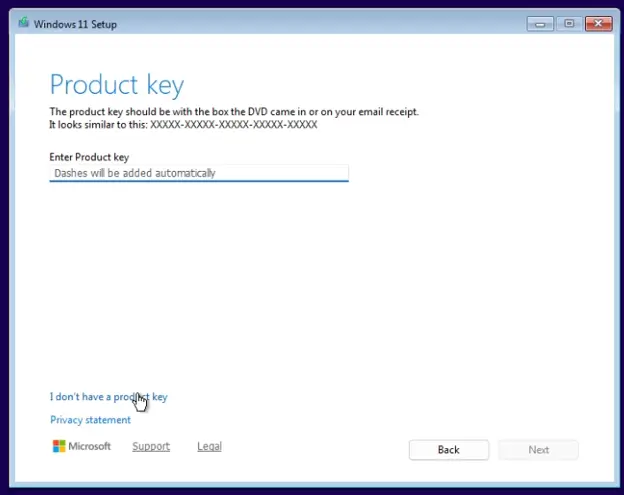
Step 3. Enter your Windows 11 product key here. If you don’t have one, click I don’t have a product key to continue.
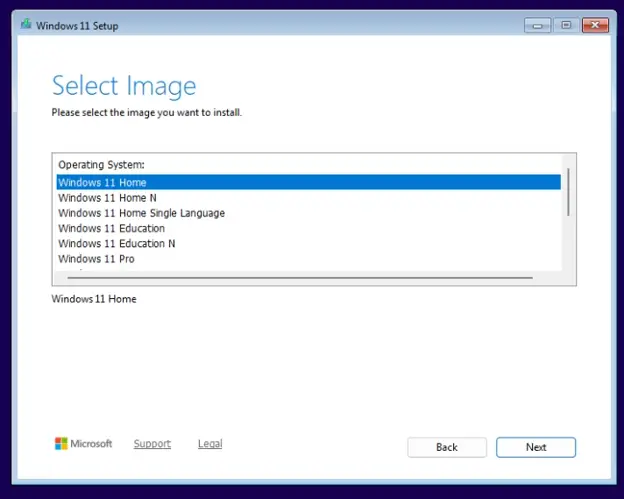
Step 4. Choose the correct edition (Windows 11 Home or Pro). Make sure it matches your license if you plan to activate later.
Step 5. Accept the License Terms and select Custom: Install Windows only (advanced).
This option is required for a clean installation on a new PC.
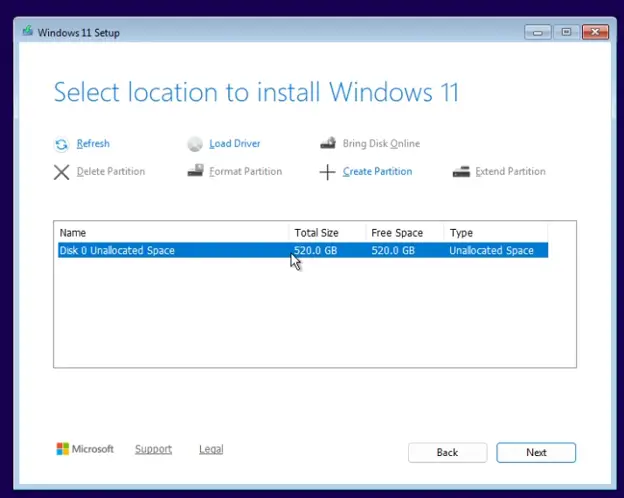
Step 5. Choose the drive where Windows will be installed. If your drive is a brand-new SSD, it may show as Unallocated Space.
Note: Your screen may look slightly different depending on your drive. Be extremely careful here. Selecting the wrong drive may erase existing data permanently.
Step 6. Click Install, and Windows will begin copying files and installing the system. After that, your PC may restart several times during this process. This is completely normal.
Part 4. Complete Windows 11 Initial Setup (OOBE)
After installation, Windows will restart and launch the Out-of-Box Experience (OOBE), which is the initial setup process for configuring your system. This step helps you personalize Windows, connect to the internet, and prepare your desktop for first use.
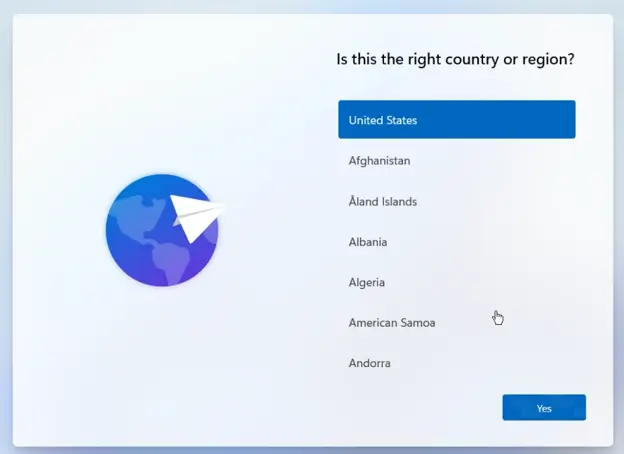
Step 1. Choose your country or region, then confirm your keyboard layout. Click Yes to continue.
Step 2. Set up Windows 11 for your device.
Step 3. Sign in with your Microsoft account to continue. Alternatively, follow offline setup options if available.
Step 4. Set up a secure PIN for faster login.
Step 5. Review and adjust privacy settings based on your preference. Click Accept to continue.
Once completed, Windows will finalize setup and take you to your new desktop.
Set Up Your New Drive After Windows Installation
After entering Windows, your system drive is ready, but additional drives may still need configuration. This step ensures all storage devices are properly usable.
Step 1. Right-click the Start Menu and select Disk Management.
Step 2. If you see a drive marked as Unallocated, right-click it and choose New Simple Volume.
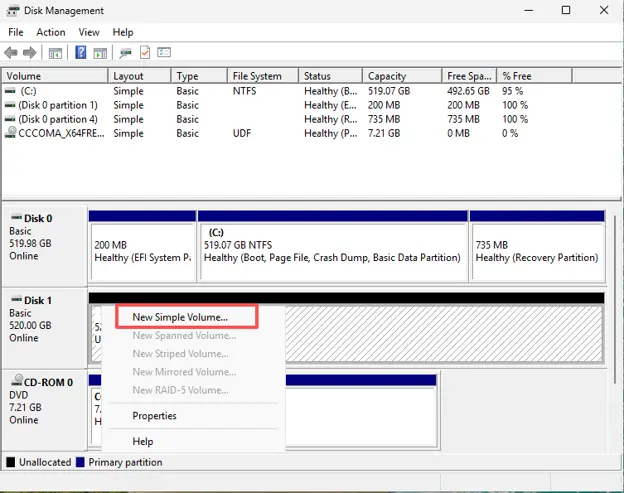
Step 3. Follow the on-screen wizard to assign a drive letter and format the disk.
How to Activate Windows 11 After Installation
Activating Windows 11 unlocks full system features and removes the watermark. If you don’t know how to do that, just follow the steps below:
Step 1. Press the Win + I keys to open the Settings window.
Step 2. Select System from the left panel and click Activation from the right panel.
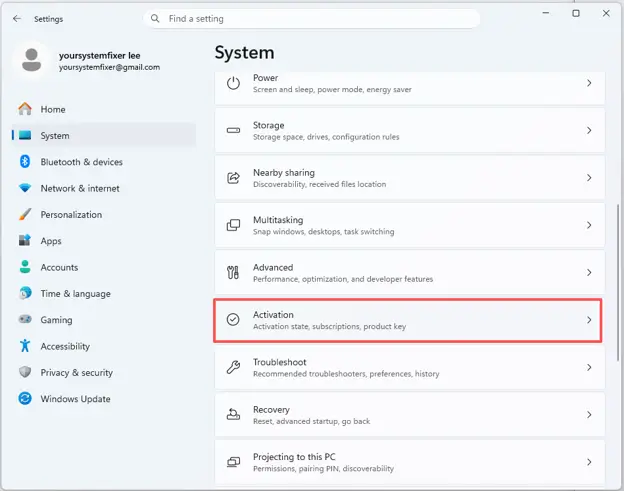
Step 3. Click Change product key and enter your valid key. Windows will automatically activate if the key is valid.
What to Do If Windows 11 Setup Fails or No Internet Appears
If you run into issues during the Windows 11 installation process, don’t panic. These problems are quite common, especially when installing on a new PC or fresh SSD. In most cases, they can be fixed within a few minutes by checking your boot settings or reinstalling the installation media.
Here are some common solutions you can try step by step:
Solution 1. Restart and Boot from USB Again
Step 1: Shut down your PC completely.
Step 2: Plug in your Windows 11 bootable USB drive.
Step 3: Turn on the PC and repeatedly press the boot menu key (such as F12, F11, ESC, or DEL, depending on your motherboard).
Step 4: Select your USB drive from the boot menu and press Enter.
If the USB does not appear, try switching to another USB port (preferably a USB 2.0 port).
Solution 2. Recreate the Bootable USB Drive
If the installation keeps failing or freezes, your USB drive may not have been created correctly. You can follow the steps above we explained to recreate the bootable USB or try formatting the USB to another file system. If the installation keeps failing or freezes, your USB drive may not have been created as FAT32 or NTFS.
Solution 3. Check BIOS Settings and Enable UEFI Mode
Incorrect BIOS settings are one of the most common reasons Windows setup fails.
Step 1: Restart your PC and enter BIOS setup (usually DEL or F2).
Step 2: Go to the Boot tab.
Step 3: Make sure UEFI mode is enabled (disable Legacy/CSM if present).
Step 4: Ensure your USB drive is set as the first boot device.
Step 5: Press F10 to save and exit.
Solution 4. Fix Missing Wi-Fi or Network Driver Issue
If Windows 11 setup cannot detect Wi-Fi networks, it usually means the network driver is missing.
Step 1: Continue installation and complete Windows setup using offline options if available.
Step 2: After reaching the desktop, open another PC and download the correct LAN/Wi-Fi driver from your motherboard or laptop manufacturer’s website.
Step 3: Transfer the driver using a USB drive, install the driver, and restart your PC.
Solution 5. Use Offline Setup If Microsoft Account Fails
If you cannot sign in with a Microsoft account during setup:
Step 1: Disconnect from the internet (unplug Ethernet or skip Wi-Fi connection).
Step 2: Look for the option “I don’t have internet” or “Continue with limited setup”.
Step 3: Create a local account instead of signing in online.
Step 4: You can connect your Microsoft account later inside Windows settings.
In most cases, Windows 11 installation issues are caused by incorrect boot settings, faulty USB creation, or missing drivers. Once these are corrected, the installation process will usually run smoothly.
FAQ
Can I install Windows 11 on a new PC without a product key?
Yes. During installation, you can click I don’t have a product key and continue installing Windows 11. The operating system will work normally, but some personalization features may be restricted until you activate Windows with a valid license.
If you already have a digital license linked to your Microsoft account, Windows may activate automatically after you sign in.
Do I need internet to install Windows 11 on a new PC?
Not necessarily. Windows 11 can often be installed without an internet connection, especially if you use a local account during setup.
However, an internet connection is recommended because it allows Windows to download updates, install drivers automatically, and activate your license. Some recent Windows 11 versions may also require internet access during the Out-of-Box Experience (OOBE).
Which drive should I choose when installing Windows 11?
For a brand-new SSD, you should typically select the drive labeled Unallocated Space and click Next. Windows Setup will automatically create the required system partitions.
If multiple drives are connected, carefully verify the drive capacity before proceeding. Installing Windows on the wrong drive could overwrite existing data.
When possible, disconnect secondary drives during installation to avoid confusion.
Is Windows 11 installation different for a custom-built PC and a prebuilt PC?
A custom-built PC usually requires you to create installation media, configure BIOS settings, and install Windows from scratch. A prebuilt PC often comes with Windows already installed, so you may only need to complete the initial setup process.
How to fix “This PC doesn’t meet minimum system requirements” on my brand-new PC?
This error is usually caused by one of the required Windows 11 security features being disabled.
First, enter BIOS and verify that TPM 2.0 and Secure Boot are enabled. Also ensure that your system is using UEFI mode instead of Legacy BIOS.
If your hardware is fully compatible and the error still appears, update the BIOS to the latest version and try the installation again.
For unsupported hardware, you can follow our detailed guide on installing Windows 11 on unsupported PCs.