Tiny11 is a lightweight, modified version of Windows 11 that removes selected pre-installed apps and system components to create a more streamlined installation. If you want a less cluttered Windows experience for an older PC, a test computer, or a virtual machine, creating a Tiny11 ISO may be worth considering.
With the official Windows 11 26H2 ISO now available, this guide explains how to use Tiny11 Builder WinUI 0.1.3 to create a Tiny11 ISO based on this version. In this guide, Your System Fixer will walk you through downloading required tools, creating a Tiny11 ISO, and installing it on your PC.
TL;DR – Watch Quick Windows 11 26H2 Tiny11 ISO Video Guide
What is Tiny11 ISO
Tiny11 is a modified Windows 11 installation image created by NTDEV. Unlike the official Windows 11 ISO, it removes selected apps and components to reduce unnecessary software and create a more streamlined installation. The exact changes also depend on the Tiny11 version and configuration.
| Feature | Tiny11 ISO | Official Windows 11 ISO |
| System image | Modified Windows installation image | Official Windows installation image |
| Preinstalled apps | Selected apps may be removed | Includes Microsoft’s standard selection |
| System components | Some components may be removed | Standard Windows components are included |
| Installation requirements | May be reduced, depending on the build | Follows the normal Windows 11 requirements |
| Windows Update and security | Availability depends on the components retained | Supported according to the Windows edition and configuration |
| Best use case | Testing or a more streamlined setup | General use and standard Windows installations |
What is Tiny11 Builder
Tiny11 Builder is an open-source tool developed by NTDEV that allows you to create a customized Windows 11 installation ISO by processing an existing Windows installation image. To create your own Tiny11 image, you need a compatible Windows ISO and Tiny11 Builder.
The earlier version of Tiny11 Builder relied on PowerShell scripts, so you had to run commands manually to create the ISO, like 25H2. However, the latest Tiny11 Builder WinUI 0.1.3 makes the process easier with a graphical interface, letting you select your Windows ISO, choose a build mode, set the workspace and output location, and build your Tiny11 ISO in just a few clicks.
How to Create a Tiny11 ISO for Windows 11 26H2 and Install It on PC
The following guide covers the complete process, from downloading the source files to installing your custom Tiny11 build.
Note: Before you begin, back up important files and use a test computer or virtual machine whenever possible. Creating a bootable USB drive will erase its existing contents, and installing Windows on the wrong disk or partition can result in data loss.
Part 1. Download Tiny11 Builder WinUI 0.1.3
First, download the Tiny11 Builder graphical application from its official GitHub release page. Make sure you obtain the files from the original project rather than an unofficial download site.
Step 1. Visit the Tiny11 Builder WinUI 0.1.3 release page.
Step 2. Scroll down to the Assets section and download the application package provided for this release.
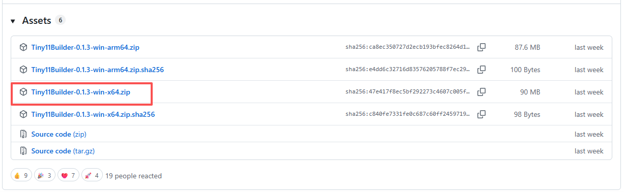
Step 3. Extract the downloaded archive, then locate the Tiny11 Builder application and double-click to launch it.
Step 4. Open the application. If any User Account Control window pops up, click Yes to continue.
Part 2. Download Official Windows 11 26H2 ISO
Tiny11 Builder needs a compatible Windows installation image as its source. Download the ISO directly from Microsoft and verify that it corresponds to Windows 11 version 26H2 before building your customized image.
Step 1. Visit Microsoft’s official Windows 11 download page.
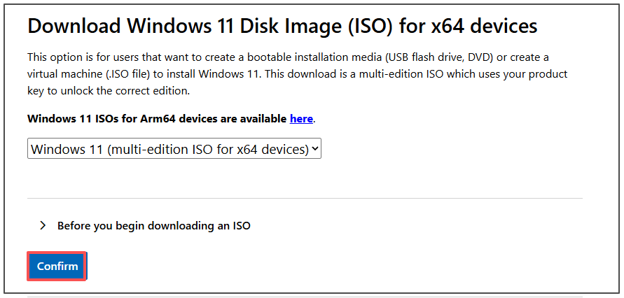
Step 2. Find the Windows 11 disk image (ISO) download section, select the ISO, and click Confirm.
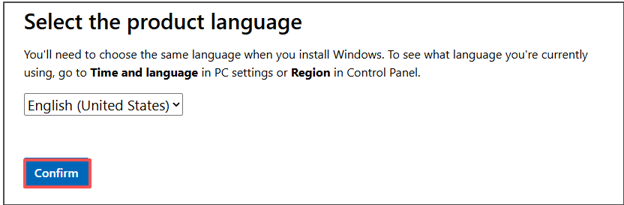
Step 3. Choose your preferred product language when prompted, then click Confirm.
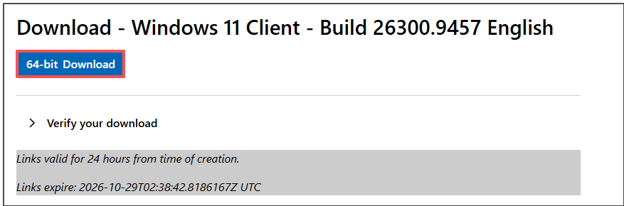
Step 5. Click 64-bit Download and wait for the download to complete.
Part 3. Create Windows 11 26H2 Tiny11 ISO
Now that you have both the source ISO and Tiny11 Builder, you can create your customized Tiny11 image. The graphical interface guides you through selecting the source file, choosing a build mode, and setting the locations used during processing.
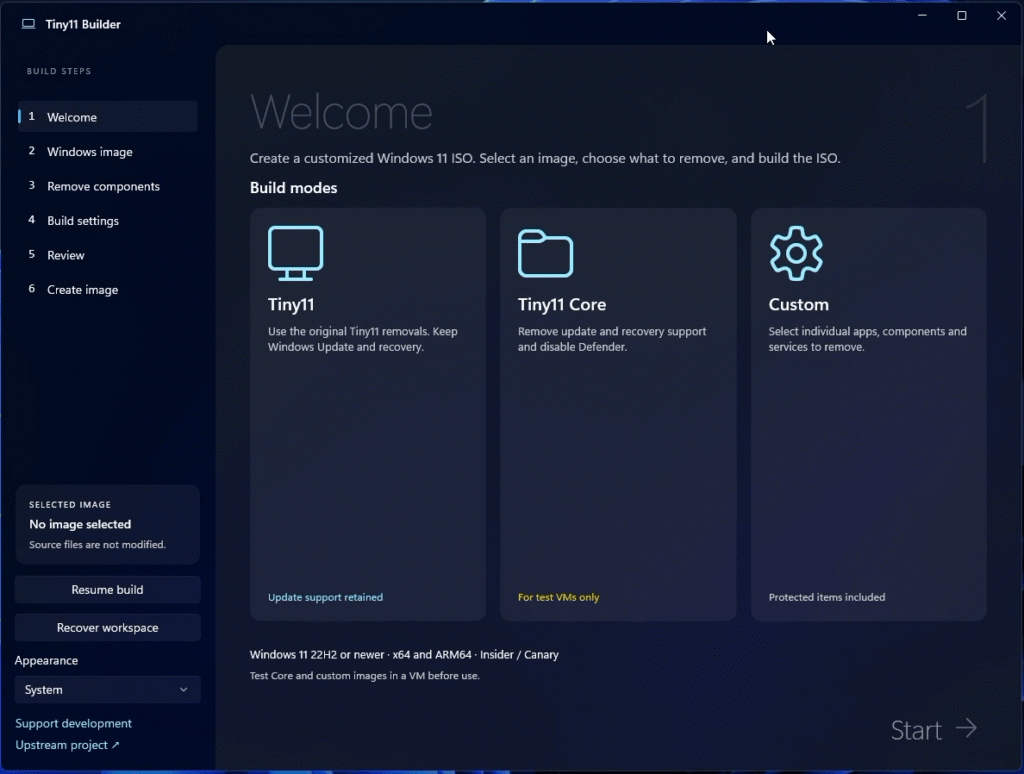
Step 1. Launch Tiny11 Builder and click Start.
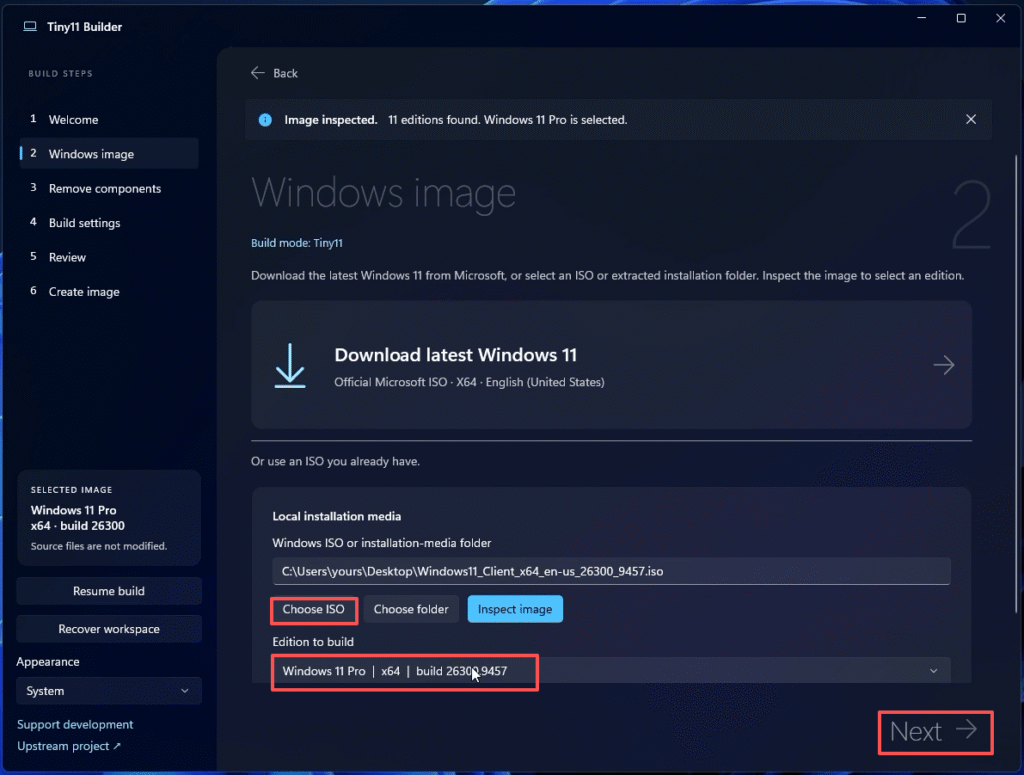
Step 2. Click Choose ISO, browse to the downloaded Windows 11 26H2 ISO, and select it as the source image.
Step 3. Select your desired Windows 11 edition to build and click Next.
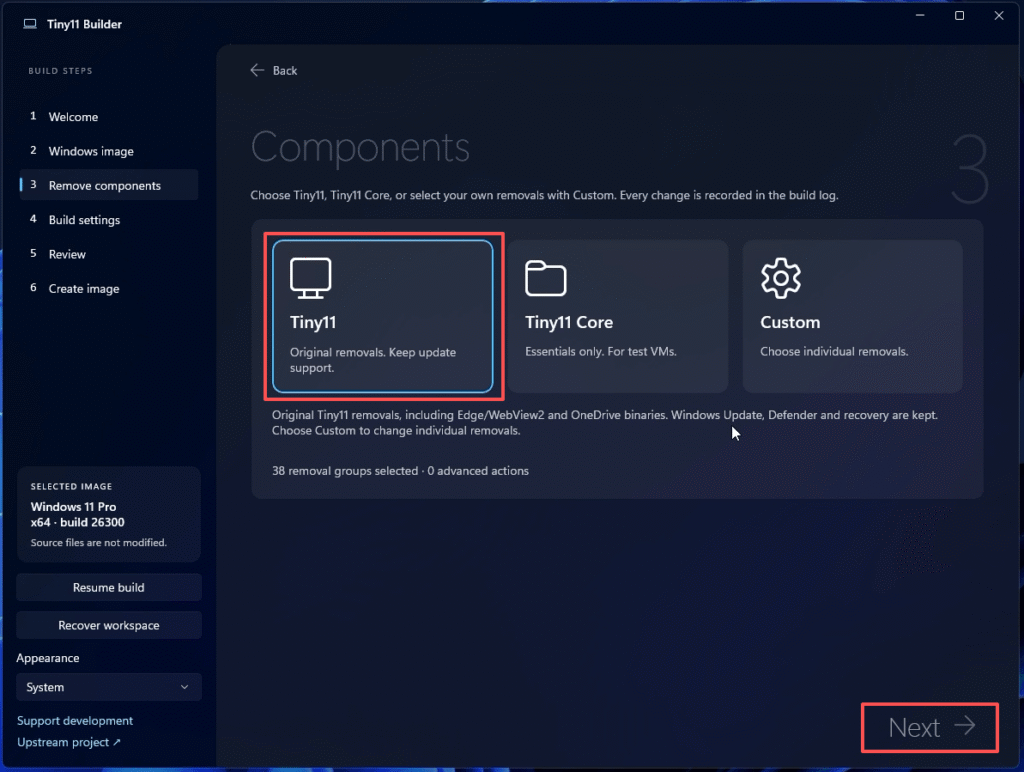
Step 4. Choose Tiny11 mode and click Next. This is the regular option for a more streamlined Windows installation. Tiny11 Core is a more heavily stripped-down alternative, mainly intended for testing. The Custom option lets you choose which apps and components to remove.
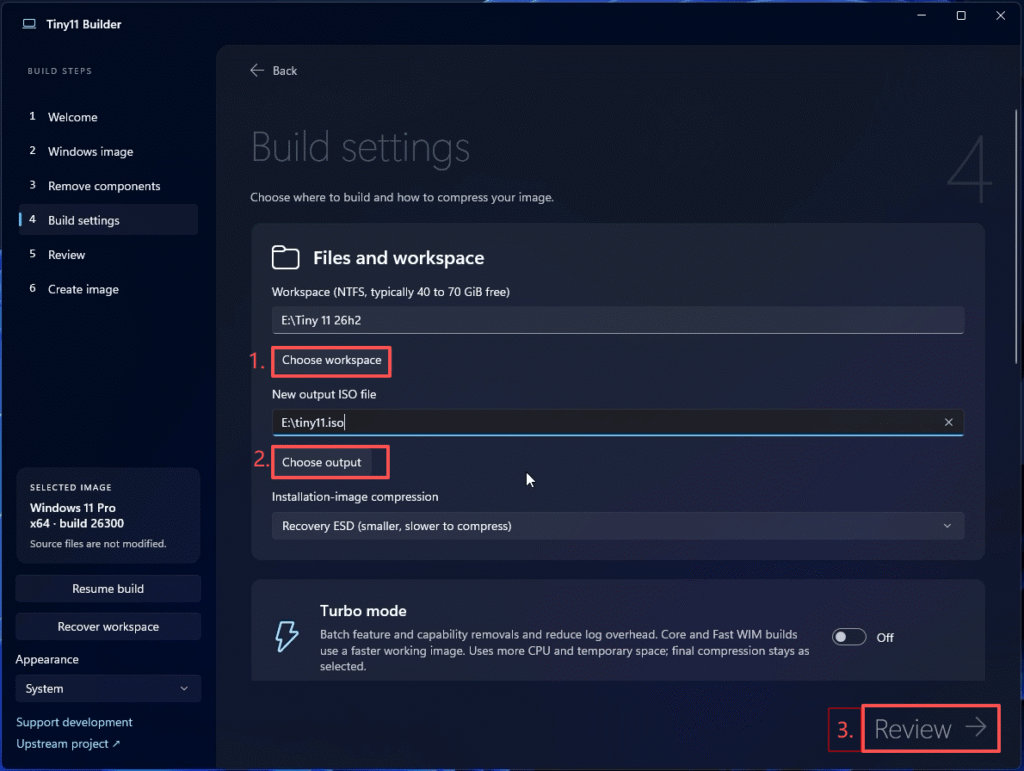
Step 5. Click Choose workspace. The workspace stores temporary files used during the image-building process. If your C: drive has limited free space, choose a drive with enough available storage, such as E:.
Step 6. Choose the output location and enter a name for the new Tiny11 ISO. This is where the completed image will be saved. You can also select E: to avoid using unnecessary space on your C: drive.
Step 7. Review the installation image compression setting. If you are unsure which option to use, keep the default setting and click Review.
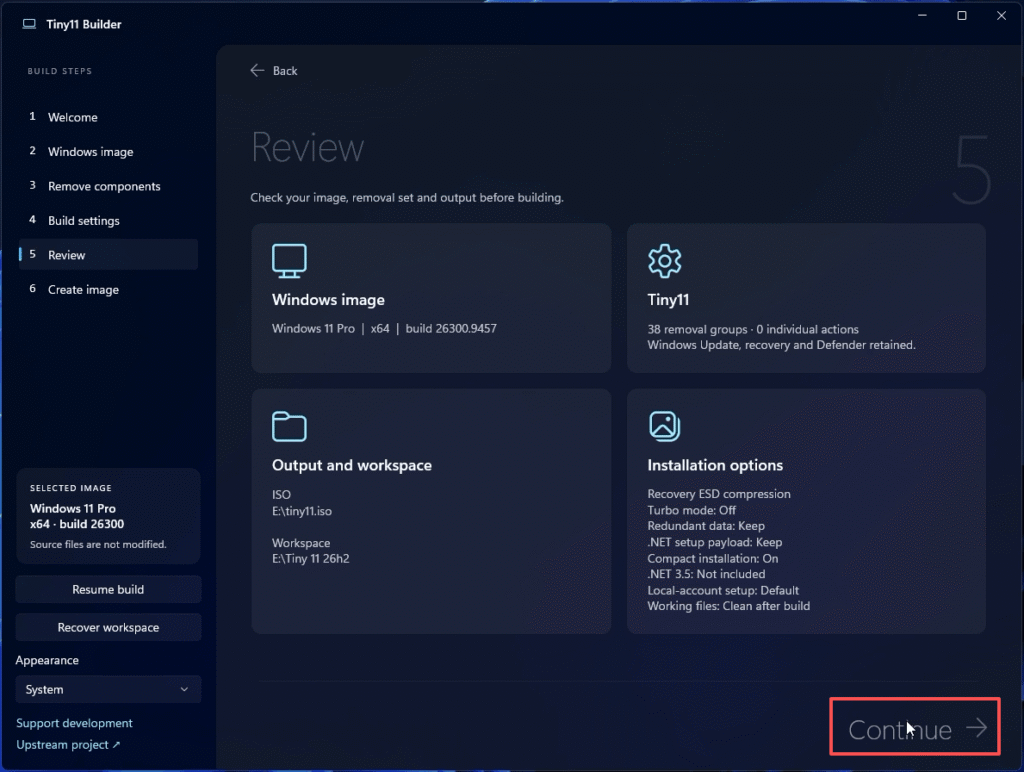
Step 8. Review your selections and click Continue.
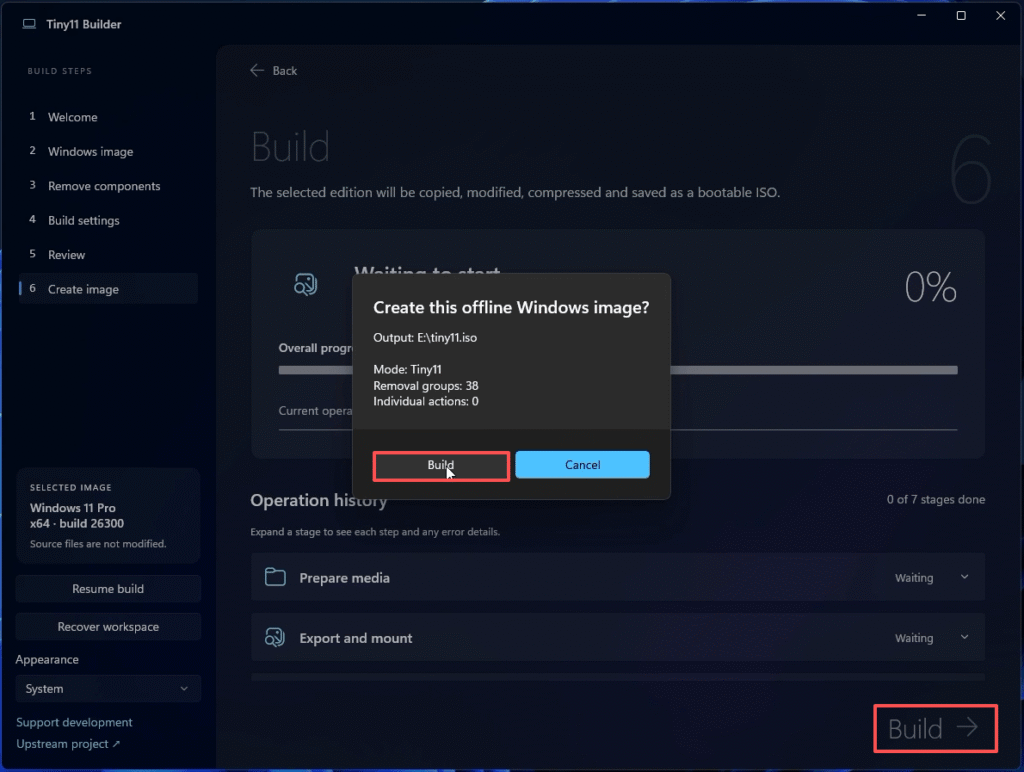
Step 9. Now, click Build, and then click Build again to start creating the customized ISO. Wait while Tiny11 Builder processes the Windows image. The process may take some time, depending on your computer, source image, and selected options.
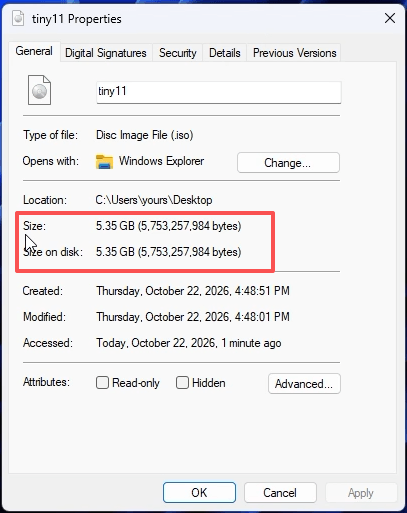
Step 10. When the process finishes, you can locate the output ISO and right-click it to select Properties. Check its file size and confirm that the image was created successfully. The final ISO size can vary.
Part 4. Create a Tiny11 Bootable USB with Rufus
Once your Tiny11 ISO is ready, you can use Rufus to create a bootable USB drive, which enables you to use this drive to start the Windows installer on a physical PC. For a safer first test, it’s recommended that you install Tiny11 26h2 in a virtual machine instead of changing your main PC’s Windows installation.
Step 1. Visit the official Rufus download page and download the available version.
Step 2. Insert a USB drive with at least 8 GB of storage. Back up any files on it first because Rufus will erase the drive during the process.
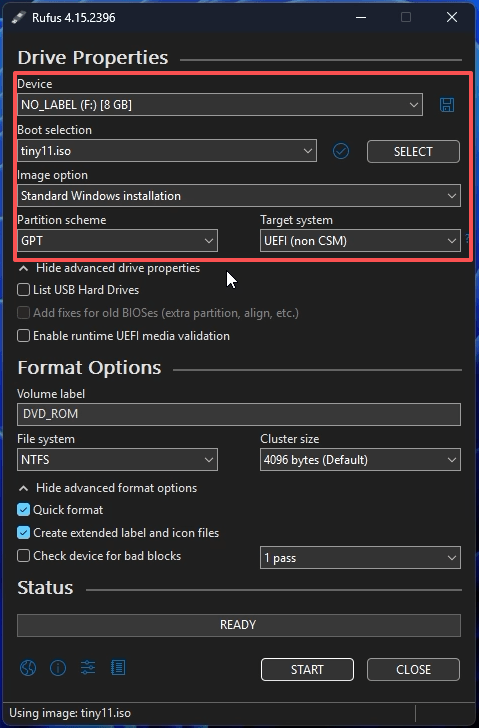
Step 3. Run Rufus and check the Device field to make sure the correct USB drive is selected.
Step 4. Click SELECT, browse to your newly created Tiny11 ISO, and open it.
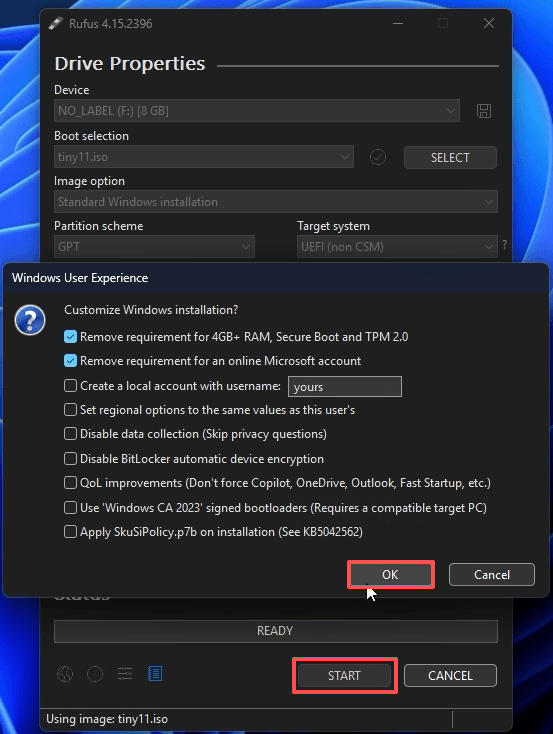
Step 5. Click START > OK. If a Windows User Experience dialog appears, review the available options and select only the settings you want.
Step 6. Read the warning that the USB drive will be erased. Confirm only if you have selected the correct drive and backed up its contents.
Step 7. Wait for Rufus to finish. When its status shows READY, close Rufus and safely eject the USB drive.
Part 5. Install Windows 11 26H2 Tiny11
With the bootable USB prepared, you can install Tiny11 on a test PC. The following steps describe a typical Windows Setup process; the exact screens and available options may vary depending on the image and hardware.
Step 1. Insert the Tiny11 USB drive into the target PC and restart it.
Step 2. Open the PC’s boot menu or firmware settings and select the USB drive. The key varies by manufacturer and may be F2, Delete, F12, F11, F9, Esc, or another key. If necessary, consult your PC manufacturer’s instructions.
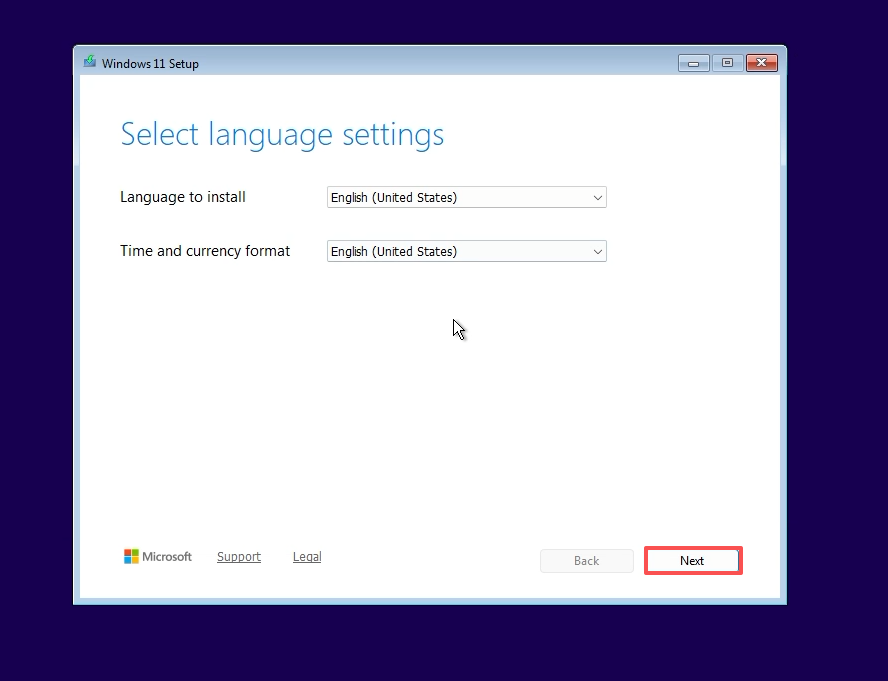
Step 3. When Windows Setup appears, select your preferred language, time and currency format, and keyboard layout, then click Next.
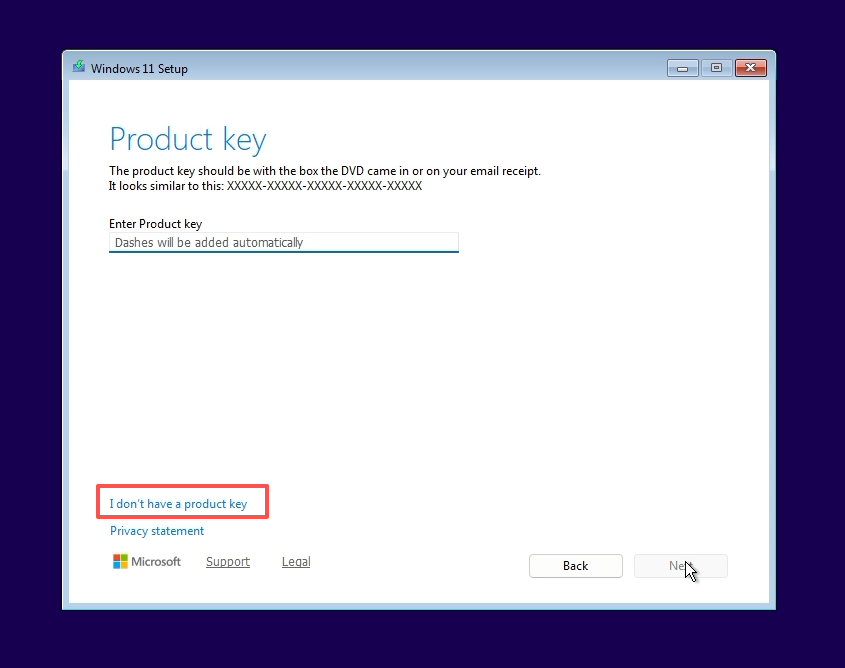
Step 4. If Windows asks for a product key and you don’t have one available, select I don’t have a product key if that option is offered. If prompted to choose an edition, select the one that matches your license.
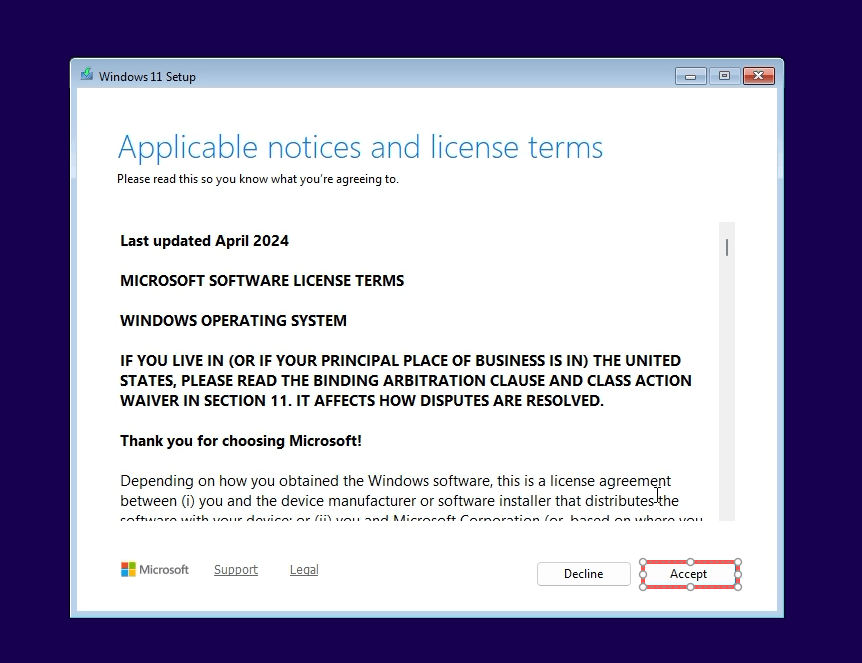
Step 6. Accept the license terms.
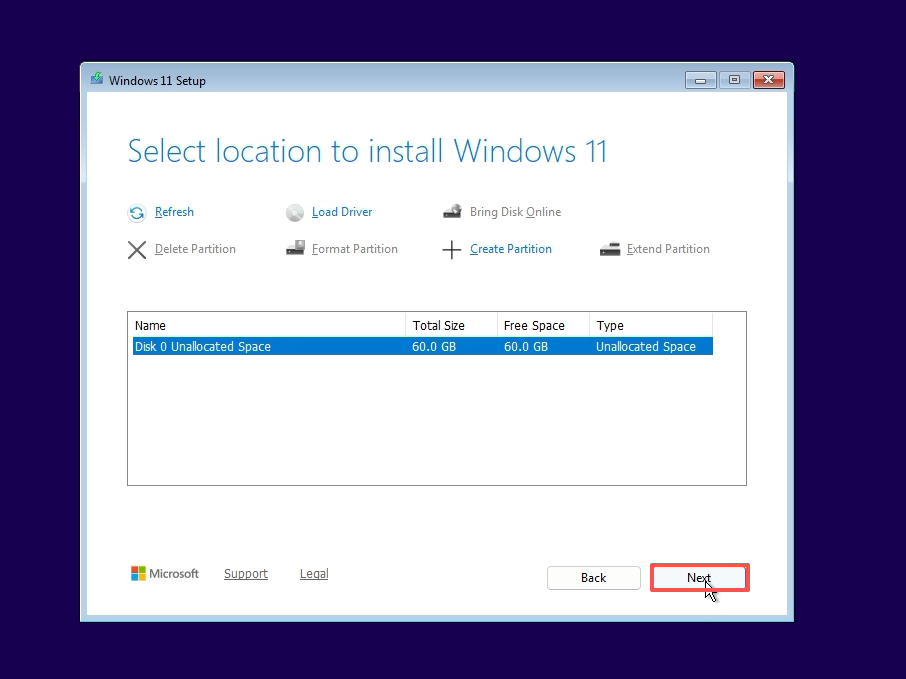
Step 7. Carefully select the target disk or partition and click Next. Formatting or deleting a partition will erase its data, so double-check the disk before proceeding.
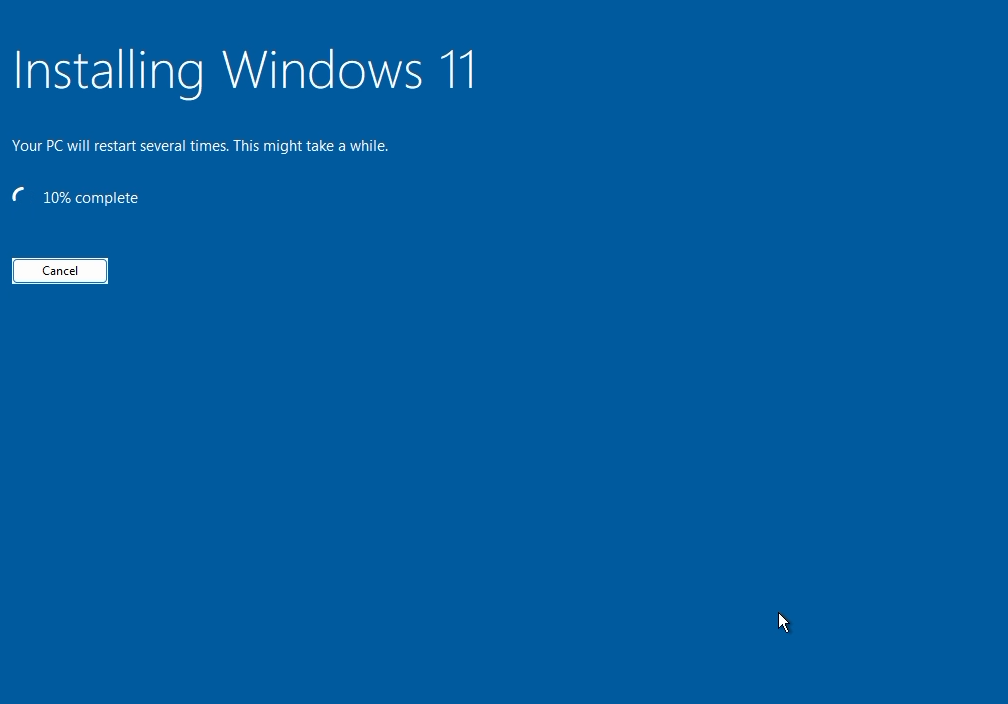
Step 8. Follow the on-screen instructions and wait for Windows Setup to copy files and complete the installation. The PC may restart several times.
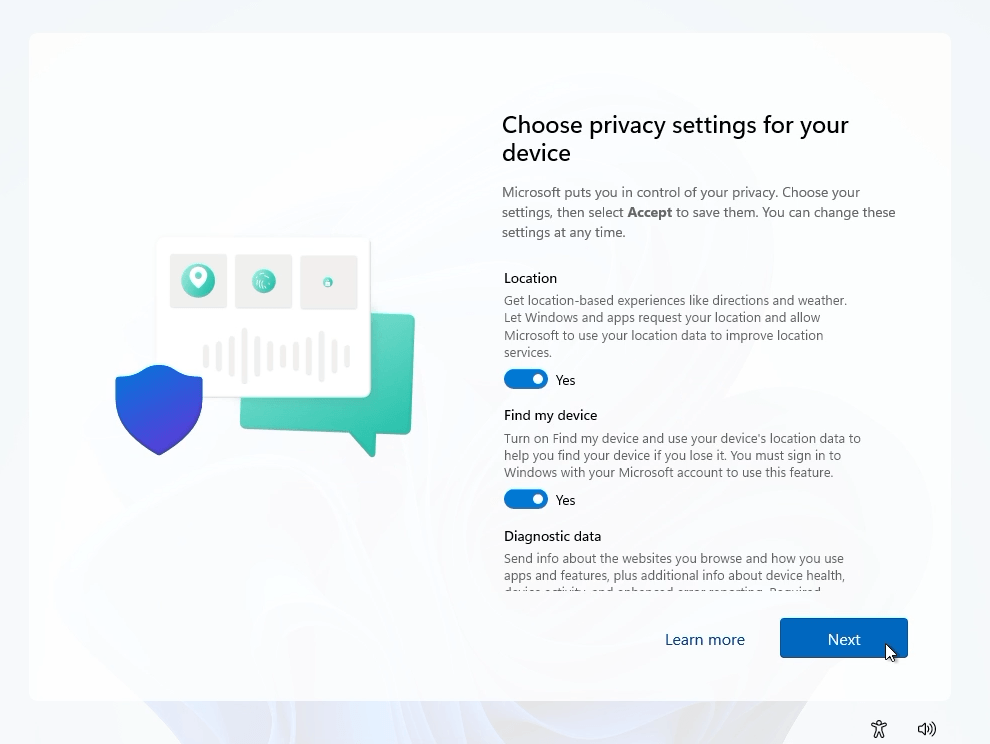
Step 9. Complete the initial setup screens, including region, keyboard, account, PIN, and privacy settings as available in your building.
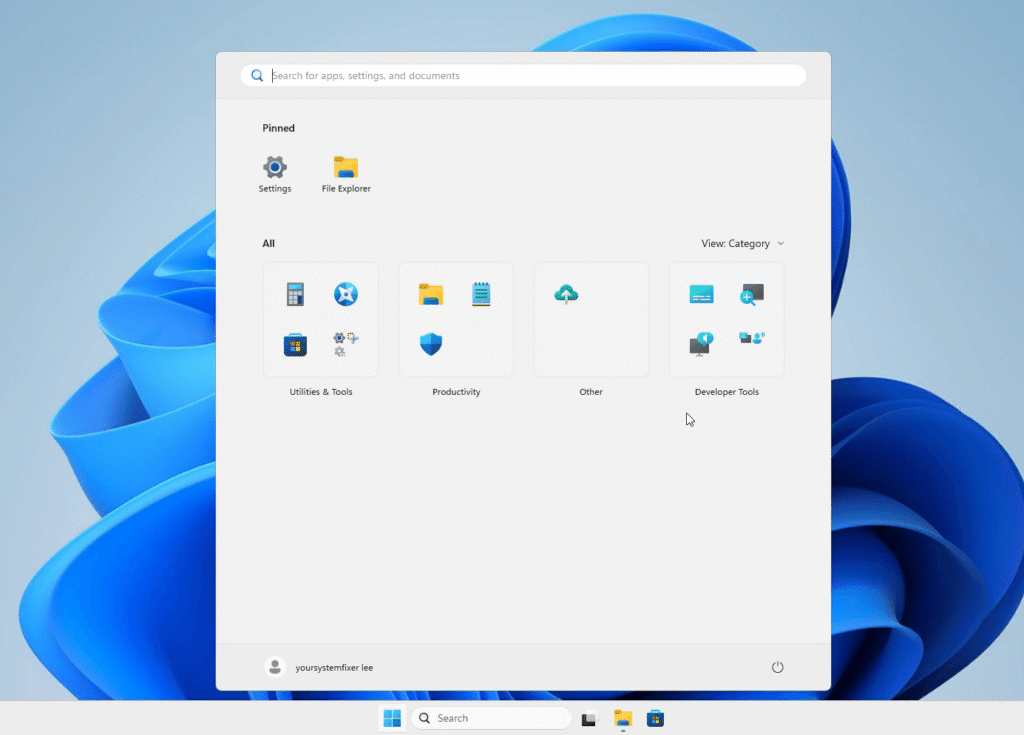
Step 10. Once the desktop loads, check the Start Menu, Task Manager, Windows Update, Windows Security, and the recovery options. Some features may be unavailable if their required components were removed or disabled.
For a safer first test, you can install the ISO in a virtual machine instead of changing your main PC’s Windows installation.
FAQ
What’s the difference between Tiny11 and Tiny11 Core?
Tiny11 removes selected apps and components while retaining more core Windows features, whereas Tiny11 Core is more heavily stripped down and removes Windows Update, recovery, or security features. Tiny11 is generally more suitable for everyday testing, while Core is better suited to specialized experiments. Exact differences depend on the build.
Is Tiny11 safe to use on my main PC?
There is no universal guarantee. Tiny11 is a modified Windows image, and removing system components may affect updates, security, recovery, or application compatibility. Test it in a virtual machine or on a secondary PC first, and use an official Windows image if you need a standard supported experience.
How to install Tiny11 Windows 11 26H2 in VMware?
Create a new Windows virtual machine and select the Tiny11 ISO. Before installation, open VM Settings and enable UEFI and Secure Boot under Options > Advanced. Add a TPM 2.0 device if supported, then allocate sufficient RAM, CPU cores, and disk space. Start the VM and follow on-screen Windows 11 Setup to complete the installation.
How to create a debloated Windows 11 ISO?
You can create a debloated Windows 11 ISO using either of these methods:
- Tiny11 Builder: Download an official Windows 11 ISO and use Tiny11 Builder to remove selected apps and components, then create a customized ISO.
- Windows-ISO-Debloater: Use this tool to customize a Windows ISO by removing unwanted components. Follow the project’s instructions to configure the image and build your customized ISO.
Whichever method you choose, test the resulting ISO in a virtual machine first to check compatibility before installing it on your main PC.